Tuesday, October 18, 2011

[Tutorial] Halloween is coming and I want to go as something adorable (unfinished)

Hello all!

Sorry for not being very active in both the blog and drawing department. This semester has been my busiest one yet, especially with thesis and package design classes. I have, however, been working on a little special something (since last year actually lol) and decided this would be the perfect place to show it off!

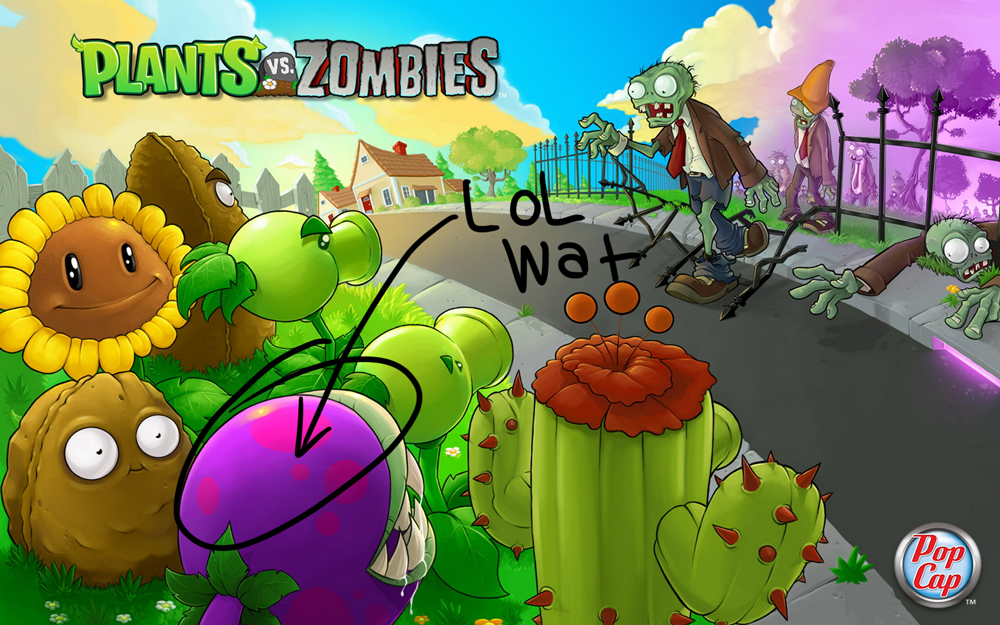
As some of you know, I'm a gaming addict - my Xbox is my child. A little over a year ago, my boyfriend introduced me to this game he had on his phone and Xbox called Plants vs. Zombies. Not only did I fall in love with the game, but I fell in love with the art style, the characters, everything! So much that I just recently decided I will have a Plants vs. Zombies themed nursery (and baby shower) for my non-existent baby.

So for this Halloween, I figured there was no better way to show off my love and my creativity than to go as one of the plants from the game - even my boyfriend liked the idea and decided to go as one of the zombies.

What plant am I? A Chomper! They aren't my favorite, but I really liked their overall look and loved the fact that they had so many different characteristics to work with (teeth, spikes, leaves, spots, etc). They're sort of creepy looking (in a sickeningly adorable way) as well, so they're perfect for Halloween!


(Note: trying to take a picture of yourself sideways and making sure it's focused is extremely difficult)

Interested in how I went about designing and making the costume? I'll tell you.

[ Step One ] __________________________________________________

I knew right away that I wanted to incorporate this costume into clothing somehow because honestly, I think most costumes that are the actual shape/size of the character are tacky and look terrible. Have you seen those Angry Bird costumes they've been selling everywhere? The one where you look like an oversized apple and your face sticks out of the middle? Yeah. Dumb. Terrible idea. Not to mention the yellow one just looks like a fat banana suit. Clothing for me it is!

First thing I looked for a was a purple hoodie. I realized that Chomper had a big mouth with a bunch of teeth, so I thought a hoodie would work and look the best because it goes over my head and I could line the hood with teeth. Adorable, right?

[ Step Two ] __________________________________________________

Chomper has four white spikes on the top of his head, which was what I worked on next. I wanted them to be of a significant size, so I was only able to fit three on the hoodie. Hey, if Popcap can forget to draw the spikes on their own creation, I can modify it to fit my costume correctly :P

To make these I bought some plain white fabric (very thin, very cheap), white thread, and some stuffing (which will be used for a later piece of the costume). Using this cone pattern, I modified the shape to the size I wanted (I think it was already pretty accurate to begin with), cut out the pattern (cone and circle), and traced them on to the white fabric.


After cutting out the shapes from the fabric, I sewed the sides of the cone together, but left the bottom open (important). Then I pinned the circle to the bottom of the cone, which deemed a little difficult if you're somewhat of a perfectionist, like me. You want to make sure that each side is even, so pin with precision.


The final step to the cone was to sew the circle to the bottom, leaving a little hole just wide enough to be able to stick your hand inside and turn the cone inside out. This hides all the stitching and makes the cone look really clean. Lastly, shove some stuffing in there. Keep in mind that you probably want your cones to be as firm as possible so they will stand outright when sewn to the hoodie.


[ Step Three ] __________________________________________________

The next part that I worked on was the leaves around the collar of the hoodie. A Chomper has leaves around it's neck, so I figured the neck of the hoodie would be an appropriate place.

First, I drew out different sized leaves (big, bigger, and smaller) on some regular computer paper, cut them out, and traced them on to the darker green fabric.


Then I cut them out of the fabric and stitched the top of leaves (big, small, big, small, etc) along the line where the hoodie and the back of the sweatshire meet. That line was convenient because it allowed the leaves to be perfectly straight around instead of crooked or all over the place.


After that, I noticed that the leaves were folding up and just generally moving around too much, so I used the double sided sticky tape to keep them down (note: the tape requires that you throw the costume into the dryer after use to help melt the glue to the fabric). The tape worked great and eliminated the messy look stitches tend to do.


For this and the next step, I would recommend fabric that doesn't fray like the kind I used (cheap kind, same as the white). You can see that the edges of the leaves are fraying and just look god awful. If I had the time to do them over again, I would.

[ Step Four ] __________________________________________________

Next was the Chomper's "lips" if that's what you want to call them I guess. Despite what they are called, Chomper's have a green outline around their mouths - I used my lighter green fabric for this because in the pictures it's a green that's noticeably lighter in color.


This step was relatively easy thanks to the hoodie's stitching, which I used to line up the edge of my green fabric. I measured out how wide the strip of green should be and pinned it along the rim of the hoddie, folding it over the edge and pinning it again on the inside of the hood. I ended up using two strips for this, but if I could do it over I would probably try using just one for a cleaner look (because you see where the two overlap). After that, I just sewed as close to the edge of the green as possible, making sure the thread was going into the green on the inside of the hood as well.


[ Step Five ] __________________________________________________

After that I attached the teeth, which surprisingly took no time at all. I used white felt for the teeth because it's more sturdy, allowing the teeth to hold their own. I basically just cut out a bunch of triangles of the same size and stitched them to the inside of the hoodie, along the edge of the light green fabric.


[ Step Six ] __________________________________________________

After the teeth I attached the magenta spots along the Chomper's head. Using the magenta felt I bought, I cut out about four different sized circles and placed them where I thought looked best based on the images I've seen of the Chompers. I had originally bought magenta thread with the intension of sewing the spots on, but initially decided it would look to messy and used the double sided sticky tape/glue instead. Be sure to tape around the edges of the circles, otherwise they will look as though they are coming off.


[ Step Seven ] __________________________________________________

The last part of the costume that requires work are the big leaves that go around the Chomper's stem. For this, I decided to make a belt type of piece with four big leaves attached to be worn almost like a skirt. This is still, however, a work in progress and I have yet to finish making the leaves (I ran out of stuffing!)

Chompers only have four leaves around their stem, which is what I'm hoping I'll end up with. I'll have to see how they end up spacing out though because I don't want too many gaps between each leaf.


Like the smaller leaves, I drew out a large leaf on 13" x 19" paper, traced it on the darker green fabric twice, and cut them out. Pinning the two leaves together, I sewed them together - as close to the edge as possible. Don't sew them all the way together, however, because you'll need to turn them inside out and stuff them like the cone. 


Once I have all the leaves complete, I plan on sewing them to the strip of green fabric I sized to fit around my waist. I want to put some velcro on the end of the strip for easy equipping and removing. The only possible problem with this is that the hoodie is going to run longer than the leaves, leaving purple between the gaps and looking stupid. If that's the case, I plan on sewing some more green fabric to the bottom of the hoodie, much like I did for the "lips" on the hood.


[ Last Step ] __________________________________________________

For the finishing touches, I purchased some green full length leggings and green socks. Only problem at the moment is that my socks are a lighter green (like the light green on my costume) and I want them to match my leggings. So if I can find some green socks before Halloween, I'll be set.

[ Conclusion ] __________________________________________________

And that's how I made a Chomper costume! I'm not the best at sewing and I don't have a sewing machine, so it's not as "professional" as I would like it to look, but I doubt people will have a problem :P

When the costume is fully complete, I'll be sure to post some full body pictures. Check back Friday or Saturday :D

Thanks for reading! Don't forget to visit my website at www.kelseykronmiller.com, like me on Facebook at http://www.facebook.com/kelseykronmillerdesigns, or follow me on Twitter @KelseyKDesigns

Monday, August 29, 2011

I spent 72 hours on Slick Deals and all I got was this t-shirt!

Well, not exactly.

For those who are in-tune to the world of technology, you probably knew that as of last week, HP decided to discontinue their new line of TouchPads (they are like iPads I guess). Instead of the regular $400 for the 16GB and $500 for the 32GB, they dropped the price to a mere $99 for the 16GB and $150 for the 32GB -- WHAT A STEAL!

Because I like to horde my money and do hours of extensive research before purchasing any sort of product (especially electronics), I was contemplating this deal (STUPIDSTUPIDSTUPID) when I first heard about it through my friend on Facebook. Do I really need it? (ITS100DOLLARSYOUIDIOT) What can I use it for? (ONEHUNDREDDOLLAAAAAAAARS) It's a whole $100.. (ITSLIKESTEALING). He posted about it early Saturday morning and it took until about noon time for the "holy shit a $100 tablet " to finally sink in. Once it did, I spent the rest of my Saturday (and weekend) trying to snag one.

I managed to get two orders through on HP (despite all the errors), but the were backordered the next day. This put me in panic mode and I immediately started looking for alternative ways to get one. Luckily, I had a friend who has some inside information from my local Best Buy and he knew I was desperate for one. He messaged me on Facebook, told me the truck had just arrived with the latest shipment of TouchPads, and like magic, a 25 minute drive turned into 15 and I was there! I was 3rd in line and the new owner of a 16GB HP TouchPad for $99. It was only one per customer, so I couldn't get one for my parents. However, after a quick phone call to HP about my order statuses, they said both of them are ready and should be shipping within a few days.

So I ended up with three of them (better to be safe than sorry?) and I plan on giving the extra one to my boyfriend for our anniversary (best girlfriend ever?).

That is what I have been doing the past week or so, so forgive me for not working on my doggies or updating this blog at all. I would also like to say welcome to all my new followers! I'm glad you guys decided to stick around!

Thanks! Check in soon for the American Eskimo!

Wednesday, August 17, 2011

[Wiggly Butts] Completed Breeds

I just realized that I haven't even posted the breeds I've completed so far! Here they are in the order they were done.

Kelsey Cartoon Kelsey Cartoon Kelsey Cartoon
Kelsey Cartoon


Tuesday, August 16, 2011

[Wiggly Butts] #8 - American Eskimo sketch!

So I revisited an old forum where I've been a member since 2009 -- Puppy & Dog Forum. It's a great little place filled with dog lovers where everyone goes to talk about dogs (no matter the breed). Having a great amount of success showing off Wiggly Butts to my (favorite) Labrador Forum, I figured people who are interested in ALL breeds would love these guys! So it was back to the Puppy & Dog Forums I went, logging in for the first time in quite a while. I made the thread, went off to work, and came back to my account banned permanently. The reason? "Spamming." Um, no.

In the thread, I mentioned that I would be offering these guys to those interested (for money), and I also put a link to my blog for people who wanted to see my progress/how I do it. I've been a member there since 2009, so it's been a while since I read the rules. Well, I went back to read them and noticed that we were not allowed to post links to any of our websites or whatever -- it would be considered "spam." That's what I was banned for (spamming).

So I get an email from one of the forum members who happened to see the thread -- she was interested in having me draw the American Eskimo! She mentioned that the mods had just banned another 2009 member because she was asking for votes for a contest she was in. Really? Is it really that horrific that she was asking a large community she has been a part of for so many years to help her out? People over at the Lab Board do it all the time -- it's great! And the worst part about it is that there was nothing in the rules saying that she wasn't allowed to do that -- it wasn't until AFTER they banned her that a mod (who sure loves being a mod) posted a sticky saying "no contest recruiting allowed." What jerks! If they don't allow that stuff (although it's silly that they don't...), there should at least be warnings given out. Myself and the other person who was banned have been members for years, we obviously weren't trying to cause any trouble, otherwise we would have been banned a long time ago. Those mods are power happy, I think (actually, I know so after going through the posts of one of them).

But to get to the actual point of this post, I wanted to show off the American Eskimo sketch. This little guy was surely a challenge! I'm not sure how well I did in making it look like an Eski, but I'm sure he will look better when he's all colored like an Eski. If anyone has any suggestions to improve him, please comment and let me know!

Saturday, August 13, 2011

[Wiggly Butts] #7 - Labrador Retriever

Here is the long awaited Labrador Retriever from my dog breed series! For those who have just started coming to this blog, I've recently started a design series based on all the breeds of dogs. You know those little stick figure family bumper/window stickers you see plastered all over SUV's and vans? If something as simple as that could explode into something so loved, imagine what people would do for something similar of their pet? Better yet, customizable to LOOK like their pet! I'm drawing each breed of dog in a standard pose, but the customer will be able to customize it however they like (colors, markings, collars, bows, missing limbs, accessories, etc). They will be sold as digital copies as well as prints, stickers, bookmarks, magnets, scrapbooking accessories, and more! They aren't up for sale yet, but if you're interested, feel free to comment or send me an email with questions.

Getting back to the project -- I decided to show the process of how I do each dog. I DO have a YouTube channel that actually records my screen while I'm shading/coloring, but I figured still images of each step wouldn't hurt either!

Step 1 - Sketching! For every breed, I find a couple of reference pictures of the breed and start the sketch within Photoshop CS4. I use a 4px brush and my document size is anywhere between 8.5"x11" to 11"x17" with a resolution of 300dpi. Sketching allows me to have a pretty finalized image of the dog that I trace over in Adobe Illustrator.


Step 2 - Lineart! Despite my love/hate (mostly hate) relationship with Illustrator, I always use this program to do the lineart. Unlike Photoshop, Illustrator allows me to resize the lines however big/small I may want them without distorting the quality. If I did the lines in Photoshop and wanted to make them bigger, I would have to do them over. So for time saving purposes, I do my lines in Illustrator. I have one layer for the sketch (with an opacity of 40% or so) and a few layers for the lineart itself.


Step 3 - Coloring Layer! Before I start the shading and highlighting process, I make a color layer, which is basically the base layer for my clipping mask and the layer I put all color/markings on. I simply magic wand the areas, expand it to about 6px, and use the paint bucket to fill in the blank layer (under the lines layer) with whatever color I choose.


Step 4 - Base Shading! Making a new layer (using the color layer as a clipping mask) and multiplying it, I start the base shading. I use just a regular, hard brush and basically cell shade the little guy (the gradient shading comes next, but it's shown in this image).


Step 5 - Gradient Shading! This is where I start the gradient shading, which is done on the "shading" layer. I lasso the area I want to gradient shade, set the gradient to about 55% (using the foreground to transparent one) and drag the tool across the selected section a few times till it looks good.


Step 6 - Highlighting! I make another layer on top of the shading layer for highlighting, changing the opacity to about 63% and using overlay. Usually while I'm shading, I'll lasso the area along the cell shade and throw in the gradient highlight. I use a very light yellow color for highlighting.


Step 7 - Bluelights! Adding another layer on top of the highlighting layer, with the opacity set to about 60%, I do the bluelights. Bluelights are the little white bits of highlighting along the shading -- they are one of the favorites parts of my style and I think it gives the piece lots of definition.


Step 8 - Coloring the Lines! The lab was relatively easy because he was just one color, but sometimes coloring the lines can be the hardest part if the dog has lots of markings (like the Aussie). All I do is lock the transparency on the "Lines" layer, take a brush, and color away!


Step 9 - Done! Add my watermark and boom, there you have it!


Friday, August 12, 2011

First of the bookmarks

So after getting frustrated with the lack of correctly aligned outcomes the first 100 times I tried printing and cutting the bookmarks, I finally tried it again -- this time with success!

For some strange reason, the printer would print the Silhouette's registration marks perfectly on regular computer paper, but it would print them off of the page on nice photo cardstock (with the same print settings). I probably wasted 20+ pieces of that photo paper trying to get it to align right. So I finally decided to place the paper above the line on the cutting mat and it worked! I sent the file to the Silhouette and let the cutting begin!


I attempted to laminate the paper with my Xyron 900 before putting it in the Silhouette, but the laminate wouldn't stick to the cutting mat, which resulted in a really messed up cut and another wasted piece of expensive photo paper. So instead, I let the Silhouette do it's thing, peeled the bookmarks off of the mat, and put them through the Xyron as individual pieces. I suppose it saves me a but more laminate, so there's a plus!


Once they were laminated, I cut them with scissors (because it's simply a matter of cutting against the sides of the paper) and prettied them up with my rounded corner hole puncher. Seriously, if you don't have one of these, I suggest you invest in the $8 to get one. I love the thing. And it's blue! :D


Next was making the tassel, which was relatively easy thanks to this awesome video I found on YouTube -- making a tassel. I base the colors of the tassel off of the colors that are displayed on the bookmarks. In this case, Kailey and Bella are both Bichons, which happen to be white. However, they always wear red and blue bows to help tell them apart and they also sport a bit of brown/tan on their ears -- so that's where I got the colors from.


And there you have it! My first two bookmarks finally complete. My bags should be arriving in a few days, so I can't wait to show these off all packaged and pretty!


Monday, August 8, 2011

Another blog?

Yes. And it is necessary, I swear. I feel like the blog on my website doesn't get as much attention as it should because it's not part of a big global community like Blogger is. People can't exactly search for my blog like they can here, and I would love for people to be able stumble upon me -- I have fun stuff! I figured I would keep the blog on my website to mainly discuss client projects, and use this one to post pictures and videos of all the crafty things I do!

So if you enjoy cute dog stuff, scrapbooking, tutorials, project ideas, and more, please follow me! I'm always looking to make new friends who enjoy similar interests!