Well, not exactly.
For those who are in-tune to the world of technology, you probably knew that as of last week, HP decided to discontinue their new line of TouchPads (they are like iPads I guess). Instead of the regular $400 for the 16GB and $500 for the 32GB, they dropped the price to a mere $99 for the 16GB and $150 for the 32GB -- WHAT A STEAL!
Because I like to horde my money and do hours of extensive research before purchasing any sort of product (especially electronics), I was contemplating this deal (STUPIDSTUPIDSTUPID) when I first heard about it through my friend on Facebook. Do I really need it? (ITS100DOLLARSYOUIDIOT) What can I use it for? (ONEHUNDREDDOLLAAAAAAAARS) It's a whole $100.. (ITSLIKESTEALING). He posted about it early Saturday morning and it took until about noon time for the "holy shit a $100 tablet " to finally sink in. Once it did, I spent the rest of my Saturday (and weekend) trying to snag one.
I managed to get two orders through on HP (despite all the errors), but the were backordered the next day. This put me in panic mode and I immediately started looking for alternative ways to get one. Luckily, I had a friend who has some inside information from my local Best Buy and he knew I was desperate for one. He messaged me on Facebook, told me the truck had just arrived with the latest shipment of TouchPads, and like magic, a 25 minute drive turned into 15 and I was there! I was 3rd in line and the new owner of a 16GB HP TouchPad for $99. It was only one per customer, so I couldn't get one for my parents. However, after a quick phone call to HP about my order statuses, they said both of them are ready and should be shipping within a few days.
So I ended up with three of them (better to be safe than sorry?) and I plan on giving the extra one to my boyfriend for our anniversary (best girlfriend ever?).
That is what I have been doing the past week or so, so forgive me for not working on my doggies or updating this blog at all. I would also like to say welcome to all my new followers! I'm glad you guys decided to stick around!
Thanks! Check in soon for the American Eskimo!
Monday, August 29, 2011
Wednesday, August 17, 2011
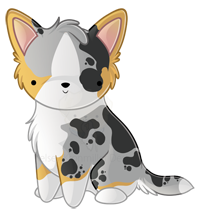
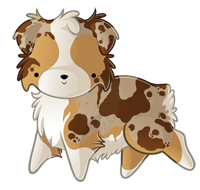
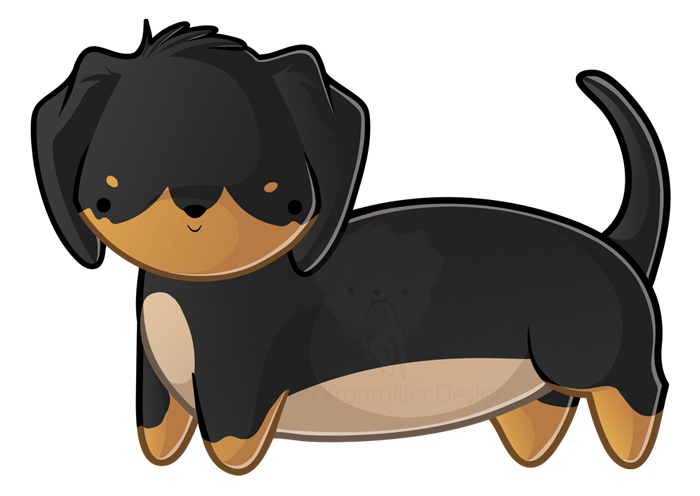
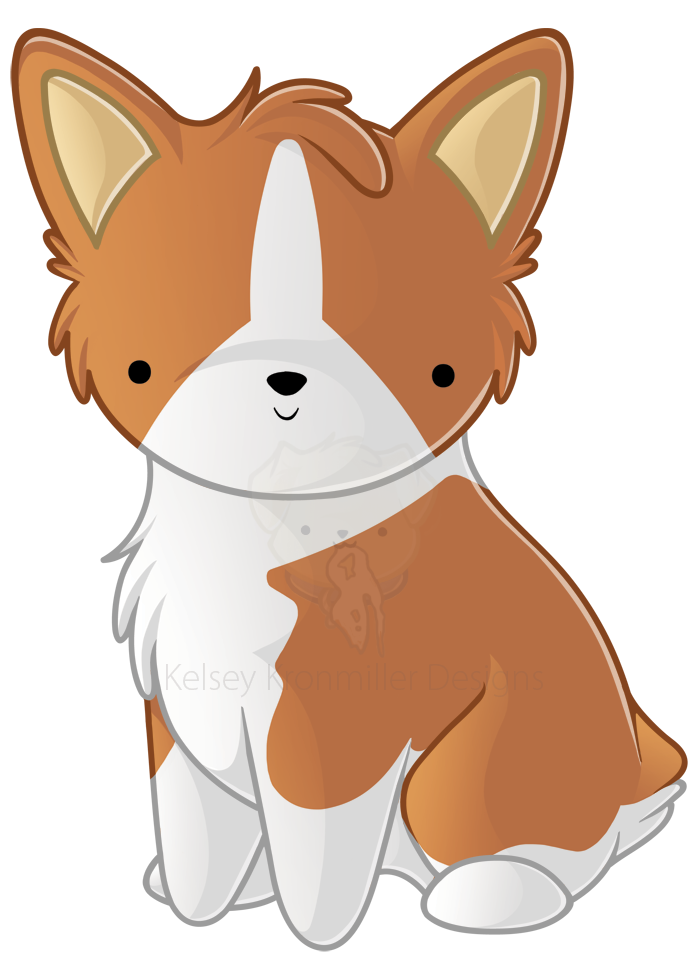
[Wiggly Butts] Completed Breeds
I just realized that I haven't even posted the breeds I've completed so far! Here they are in the order they were done.


Tuesday, August 16, 2011
[Wiggly Butts] #8 - American Eskimo sketch!
So I revisited an old forum where I've been a member since 2009 -- Puppy & Dog Forum. It's a great little place filled with dog lovers where everyone goes to talk about dogs (no matter the breed). Having a great amount of success showing off Wiggly Butts to my (favorite) Labrador Forum, I figured people who are interested in ALL breeds would love these guys! So it was back to the Puppy & Dog Forums I went, logging in for the first time in quite a while. I made the thread, went off to work, and came back to my account banned permanently. The reason? "Spamming." Um, no.
In the thread, I mentioned that I would be offering these guys to those interested (for money), and I also put a link to my blog for people who wanted to see my progress/how I do it. I've been a member there since 2009, so it's been a while since I read the rules. Well, I went back to read them and noticed that we were not allowed to post links to any of our websites or whatever -- it would be considered "spam." That's what I was banned for (spamming).
So I get an email from one of the forum members who happened to see the thread -- she was interested in having me draw the American Eskimo! She mentioned that the mods had just banned another 2009 member because she was asking for votes for a contest she was in. Really? Is it really that horrific that she was asking a large community she has been a part of for so many years to help her out? People over at the Lab Board do it all the time -- it's great! And the worst part about it is that there was nothing in the rules saying that she wasn't allowed to do that -- it wasn't until AFTER they banned her that a mod (who sure loves being a mod) posted a sticky saying "no contest recruiting allowed." What jerks! If they don't allow that stuff (although it's silly that they don't...), there should at least be warnings given out. Myself and the other person who was banned have been members for years, we obviously weren't trying to cause any trouble, otherwise we would have been banned a long time ago. Those mods are power happy, I think (actually, I know so after going through the posts of one of them).
But to get to the actual point of this post, I wanted to show off the American Eskimo sketch. This little guy was surely a challenge! I'm not sure how well I did in making it look like an Eski, but I'm sure he will look better when he's all colored like an Eski. If anyone has any suggestions to improve him, please comment and let me know!

Saturday, August 13, 2011
[Wiggly Butts] #7 - Labrador Retriever
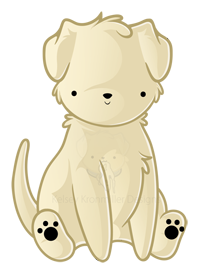
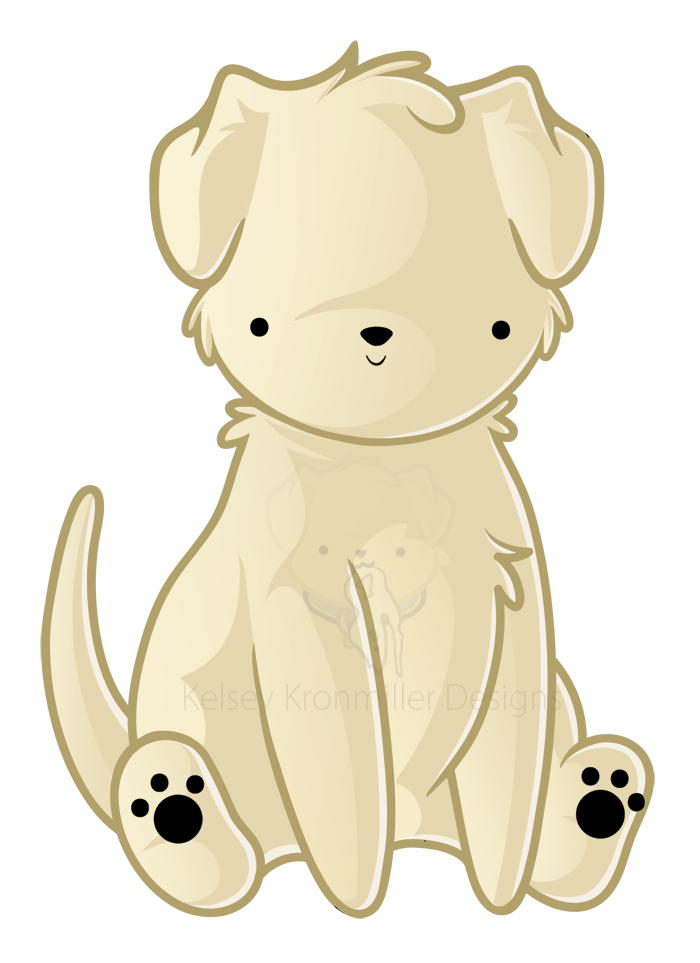
Here is the long awaited Labrador Retriever from my dog breed series! For those who have just started coming to this blog, I've recently started a design series based on all the breeds of dogs. You know those little stick figure family bumper/window stickers you see plastered all over SUV's and vans? If something as simple as that could explode into something so loved, imagine what people would do for something similar of their pet? Better yet, customizable to LOOK like their pet! I'm drawing each breed of dog in a standard pose, but the customer will be able to customize it however they like (colors, markings, collars, bows, missing limbs, accessories, etc). They will be sold as digital copies as well as prints, stickers, bookmarks, magnets, scrapbooking accessories, and more! They aren't up for sale yet, but if you're interested, feel free to comment or send me an email with questions.
Getting back to the project -- I decided to show the process of how I do each dog. I DO have a YouTube channel that actually records my screen while I'm shading/coloring, but I figured still images of each step wouldn't hurt either!
Step 1 - Sketching! For every breed, I find a couple of reference pictures of the breed and start the sketch within Photoshop CS4. I use a 4px brush and my document size is anywhere between 8.5"x11" to 11"x17" with a resolution of 300dpi. Sketching allows me to have a pretty finalized image of the dog that I trace over in Adobe Illustrator.

Step 2 - Lineart! Despite my love/hate (mostly hate) relationship with Illustrator, I always use this program to do the lineart. Unlike Photoshop, Illustrator allows me to resize the lines however big/small I may want them without distorting the quality. If I did the lines in Photoshop and wanted to make them bigger, I would have to do them over. So for time saving purposes, I do my lines in Illustrator. I have one layer for the sketch (with an opacity of 40% or so) and a few layers for the lineart itself.

Step 3 - Coloring Layer! Before I start the shading and highlighting process, I make a color layer, which is basically the base layer for my clipping mask and the layer I put all color/markings on. I simply magic wand the areas, expand it to about 6px, and use the paint bucket to fill in the blank layer (under the lines layer) with whatever color I choose.

Step 4 - Base Shading! Making a new layer (using the color layer as a clipping mask) and multiplying it, I start the base shading. I use just a regular, hard brush and basically cell shade the little guy (the gradient shading comes next, but it's shown in this image).

Step 5 - Gradient Shading! This is where I start the gradient shading, which is done on the "shading" layer. I lasso the area I want to gradient shade, set the gradient to about 55% (using the foreground to transparent one) and drag the tool across the selected section a few times till it looks good.

Step 6 - Highlighting! I make another layer on top of the shading layer for highlighting, changing the opacity to about 63% and using overlay. Usually while I'm shading, I'll lasso the area along the cell shade and throw in the gradient highlight. I use a very light yellow color for highlighting.

Step 7 - Bluelights! Adding another layer on top of the highlighting layer, with the opacity set to about 60%, I do the bluelights. Bluelights are the little white bits of highlighting along the shading -- they are one of the favorites parts of my style and I think it gives the piece lots of definition.

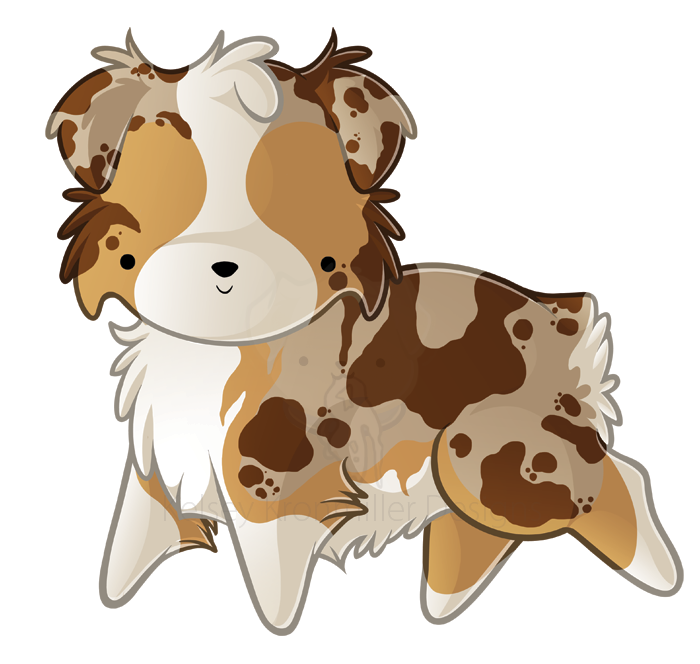
Step 8 - Coloring the Lines! The lab was relatively easy because he was just one color, but sometimes coloring the lines can be the hardest part if the dog has lots of markings (like the Aussie). All I do is lock the transparency on the "Lines" layer, take a brush, and color away!

Step 9 - Done! Add my watermark and boom, there you have it!

Getting back to the project -- I decided to show the process of how I do each dog. I DO have a YouTube channel that actually records my screen while I'm shading/coloring, but I figured still images of each step wouldn't hurt either!
Step 1 - Sketching! For every breed, I find a couple of reference pictures of the breed and start the sketch within Photoshop CS4. I use a 4px brush and my document size is anywhere between 8.5"x11" to 11"x17" with a resolution of 300dpi. Sketching allows me to have a pretty finalized image of the dog that I trace over in Adobe Illustrator.

Step 2 - Lineart! Despite my love/hate (mostly hate) relationship with Illustrator, I always use this program to do the lineart. Unlike Photoshop, Illustrator allows me to resize the lines however big/small I may want them without distorting the quality. If I did the lines in Photoshop and wanted to make them bigger, I would have to do them over. So for time saving purposes, I do my lines in Illustrator. I have one layer for the sketch (with an opacity of 40% or so) and a few layers for the lineart itself.

Step 3 - Coloring Layer! Before I start the shading and highlighting process, I make a color layer, which is basically the base layer for my clipping mask and the layer I put all color/markings on. I simply magic wand the areas, expand it to about 6px, and use the paint bucket to fill in the blank layer (under the lines layer) with whatever color I choose.

Step 4 - Base Shading! Making a new layer (using the color layer as a clipping mask) and multiplying it, I start the base shading. I use just a regular, hard brush and basically cell shade the little guy (the gradient shading comes next, but it's shown in this image).

Step 5 - Gradient Shading! This is where I start the gradient shading, which is done on the "shading" layer. I lasso the area I want to gradient shade, set the gradient to about 55% (using the foreground to transparent one) and drag the tool across the selected section a few times till it looks good.

Step 6 - Highlighting! I make another layer on top of the shading layer for highlighting, changing the opacity to about 63% and using overlay. Usually while I'm shading, I'll lasso the area along the cell shade and throw in the gradient highlight. I use a very light yellow color for highlighting.

Step 7 - Bluelights! Adding another layer on top of the highlighting layer, with the opacity set to about 60%, I do the bluelights. Bluelights are the little white bits of highlighting along the shading -- they are one of the favorites parts of my style and I think it gives the piece lots of definition.

Step 8 - Coloring the Lines! The lab was relatively easy because he was just one color, but sometimes coloring the lines can be the hardest part if the dog has lots of markings (like the Aussie). All I do is lock the transparency on the "Lines" layer, take a brush, and color away!

Step 9 - Done! Add my watermark and boom, there you have it!

Friday, August 12, 2011
First of the bookmarks
So after getting frustrated with the lack of correctly aligned outcomes the first 100 times I tried printing and cutting the bookmarks, I finally tried it again -- this time with success!
For some strange reason, the printer would print the Silhouette's registration marks perfectly on regular computer paper, but it would print them off of the page on nice photo cardstock (with the same print settings). I probably wasted 20+ pieces of that photo paper trying to get it to align right. So I finally decided to place the paper above the line on the cutting mat and it worked! I sent the file to the Silhouette and let the cutting begin!

I attempted to laminate the paper with my Xyron 900 before putting it in the Silhouette, but the laminate wouldn't stick to the cutting mat, which resulted in a really messed up cut and another wasted piece of expensive photo paper. So instead, I let the Silhouette do it's thing, peeled the bookmarks off of the mat, and put them through the Xyron as individual pieces. I suppose it saves me a but more laminate, so there's a plus!

Once they were laminated, I cut them with scissors (because it's simply a matter of cutting against the sides of the paper) and prettied them up with my rounded corner hole puncher. Seriously, if you don't have one of these, I suggest you invest in the $8 to get one. I love the thing. And it's blue! :D

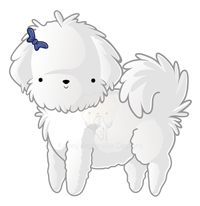
Next was making the tassel, which was relatively easy thanks to this awesome video I found on YouTube -- making a tassel. I base the colors of the tassel off of the colors that are displayed on the bookmarks. In this case, Kailey and Bella are both Bichons, which happen to be white. However, they always wear red and blue bows to help tell them apart and they also sport a bit of brown/tan on their ears -- so that's where I got the colors from.

And there you have it! My first two bookmarks finally complete. My bags should be arriving in a few days, so I can't wait to show these off all packaged and pretty!


For some strange reason, the printer would print the Silhouette's registration marks perfectly on regular computer paper, but it would print them off of the page on nice photo cardstock (with the same print settings). I probably wasted 20+ pieces of that photo paper trying to get it to align right. So I finally decided to place the paper above the line on the cutting mat and it worked! I sent the file to the Silhouette and let the cutting begin!

I attempted to laminate the paper with my Xyron 900 before putting it in the Silhouette, but the laminate wouldn't stick to the cutting mat, which resulted in a really messed up cut and another wasted piece of expensive photo paper. So instead, I let the Silhouette do it's thing, peeled the bookmarks off of the mat, and put them through the Xyron as individual pieces. I suppose it saves me a but more laminate, so there's a plus!

Once they were laminated, I cut them with scissors (because it's simply a matter of cutting against the sides of the paper) and prettied them up with my rounded corner hole puncher. Seriously, if you don't have one of these, I suggest you invest in the $8 to get one. I love the thing. And it's blue! :D

Next was making the tassel, which was relatively easy thanks to this awesome video I found on YouTube -- making a tassel. I base the colors of the tassel off of the colors that are displayed on the bookmarks. In this case, Kailey and Bella are both Bichons, which happen to be white. However, they always wear red and blue bows to help tell them apart and they also sport a bit of brown/tan on their ears -- so that's where I got the colors from.

And there you have it! My first two bookmarks finally complete. My bags should be arriving in a few days, so I can't wait to show these off all packaged and pretty!


Monday, August 8, 2011
Another blog?
Yes. And it is necessary, I swear. I feel like the blog on my website doesn't get as much attention as it should because it's not part of a big global community like Blogger is. People can't exactly search for my blog like they can here, and I would love for people to be able stumble upon me -- I have fun stuff! I figured I would keep the blog on my website to mainly discuss client projects, and use this one to post pictures and videos of all the crafty things I do!
So if you enjoy cute dog stuff, scrapbooking, tutorials, project ideas, and more, please follow me! I'm always looking to make new friends who enjoy similar interests!
So if you enjoy cute dog stuff, scrapbooking, tutorials, project ideas, and more, please follow me! I'm always looking to make new friends who enjoy similar interests!
Subscribe to:
Posts (Atom)